PBR Settings
PBR (Physically Based Rendering) maps are texture maps used in 3D modeling to create realistic materials that accurately simulate how light interacts with surfaces. They are commonly used in advanced archviz workflows as well as in video games and film to create more lifelike and believable visual effects. Architextures dynamically creates the following maps for textures created in the web app.
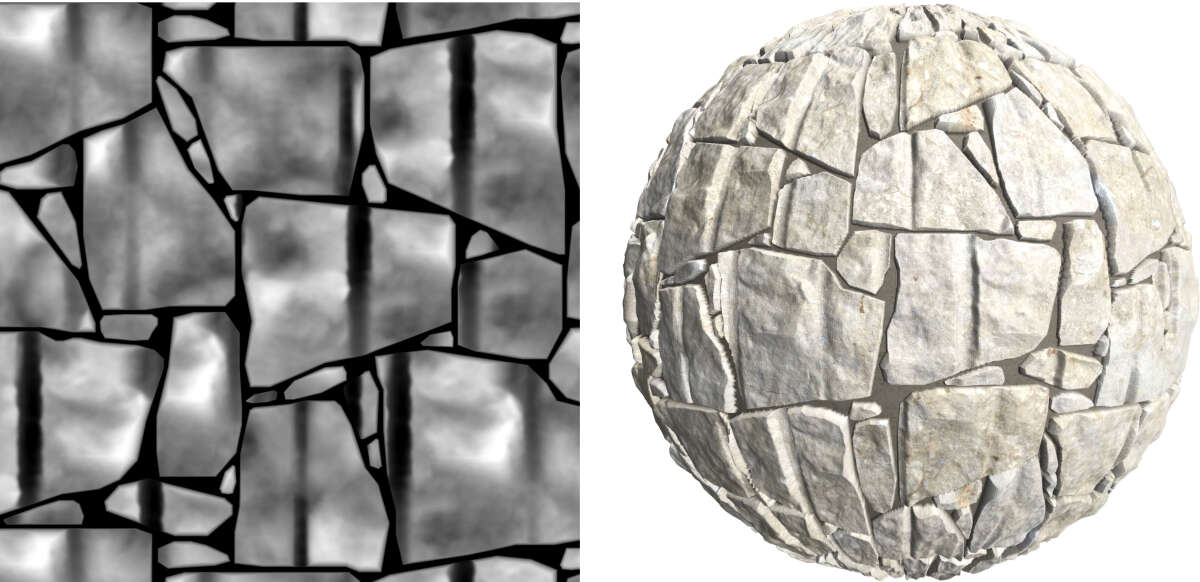
Displacement map
Displacement maps are used to add depth to a surface making it possible to create physically accurate geometry. This is achieved with a simple grayscale image of the texture where the brightness corresponds to the depth, darker areas of the image represent lower regions and lighter areas represent higher sections. When applied to a 3D model the displacement map physically alters the geometry of the surface it's applied to.
On Architextures, by default the displacement map shows tiles as a light tone and the joints dark giving the appearance of the joints being recessed below the tile. Settings that affect the geometry of the tile, like edges, profiles and finishes will also be applied onto the displacement map automatically creating complex geometry automatically. The displacement map for the tile can be customised further by applying the source image onto the tile's displacement map by selecting one of the image options. Options that control the appearance of a tile on the displacement map, can be accessed by clicking the displacement button.
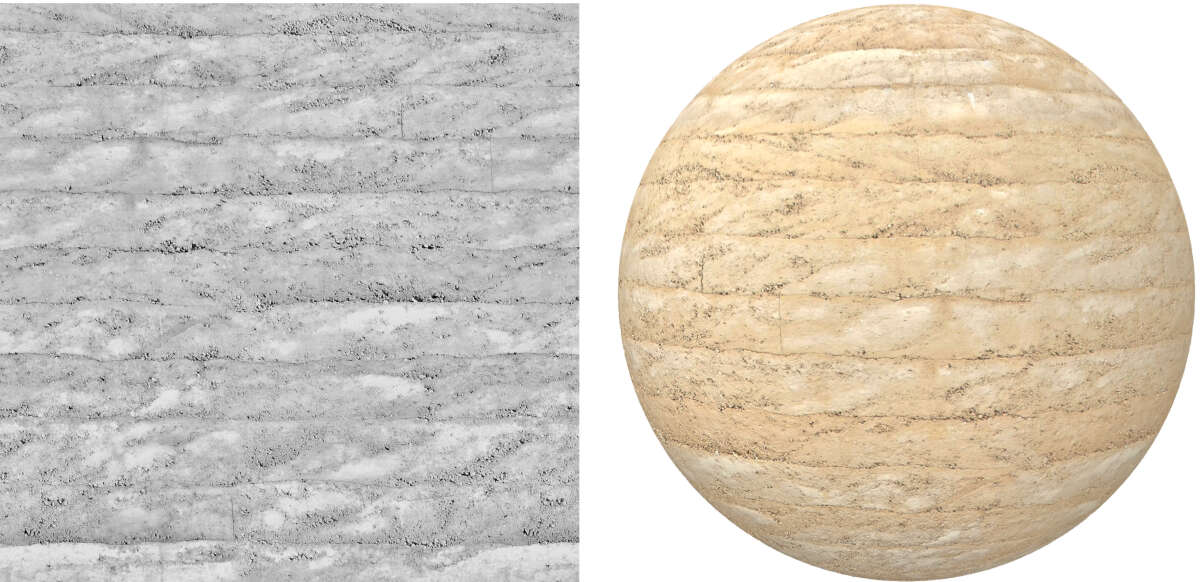
Bump map
Like displacement maps, bump maps also represent depth and are used to simulate the lighting and shadows across a surface. Bump maps don't alter the geometry of the 3D model and are normally used for small surface details that don't change the overall shape of the geometry, such as scratches and imperfections.
For bump maps on Architextures, tiles are white and joints are black by default. Options for bump and normal maps for tiles are controlled in a single menu accessed with the bump icon:
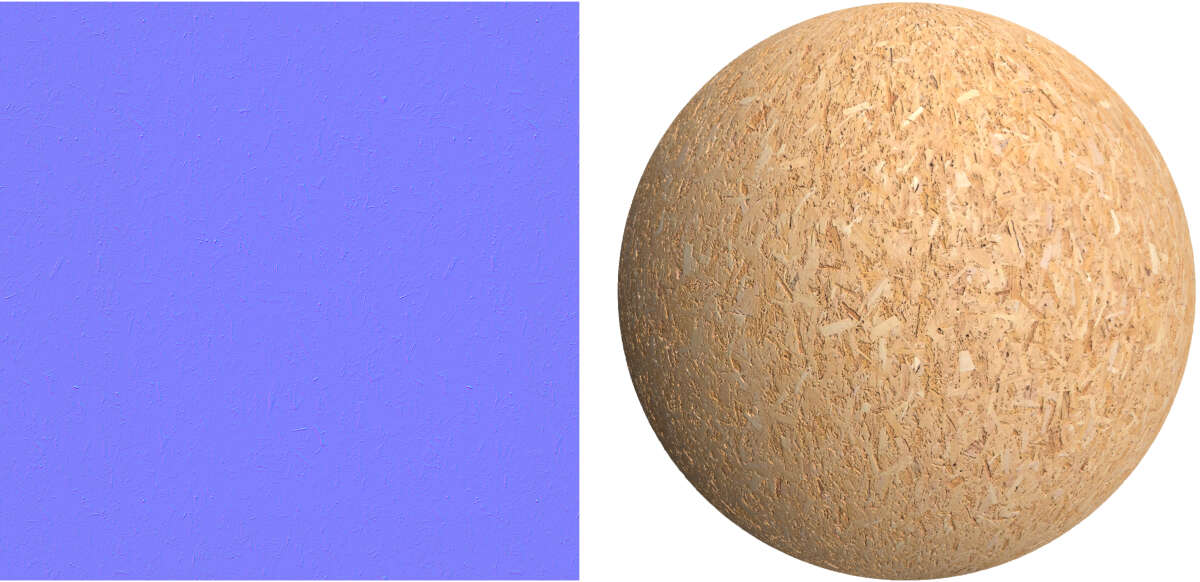
Normal map
Normal maps simulate depth as an RGB image where the value of each pixel represents the angle of the surface normal. Like bump maps they are used to simulate light and shadow and do not affect the physical geometry of the surface in a 3D model. Options for bump and normal maps for tiles are controlled in a single menu accessed with the bump icon:
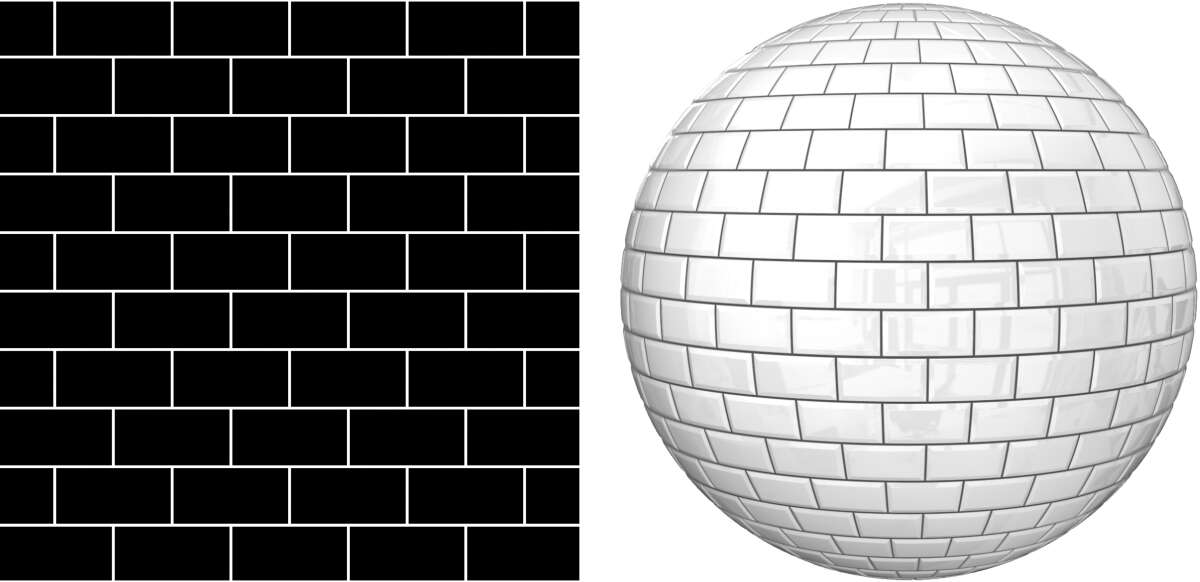
Roughness map
Roughness maps are grayscale images that indicates how rough the texture is in a given area. The shade of the pixel determines the amount of roughness at that point, with darker pixels indicating a smoother surface and lighter pixels indicating a rougher surface. Rougher surfaces scatter light more, creating a diffuse appearance, while smoother surfaces reflect more light, creating a glossy appearance.
Joints are shown completely rough in Architextures by default. The roughness of the tile can be controlled in the Roughness Settings menu. The 'Base roughness' slider controls the solid fill of the tile from black (completely smooth) to white (completely rough). The 'Image' option allows you to select a source image for the tile and is applied with the 'darken' blend mode so that the base roughness is still visible.
Metalness map
Metalness indicate metallic and non-metallic areas of the texture with a grayscale image where lighter pixels are metallic while darker pixels are less metallic. When rendering a 3D scene, the metalness map is used by the renderer to determine how much of the incoming light should be reflected specularly, like a mirror, and how much should be diffusely reflected, like a rough or matte surface.
On Architextures, joints are always depicted completely non-metallic by default. The metalness settings of the tile can be controlled in the 'Metalness Settings' menu. The 'Base metalness' slider controls the solid fill of the tile from black (Non-metallic) to white (Metallic). The 'Image' option allows you to select a source image for the tile and is applied with the 'darken' blend mode so that the base metalness is still visible.
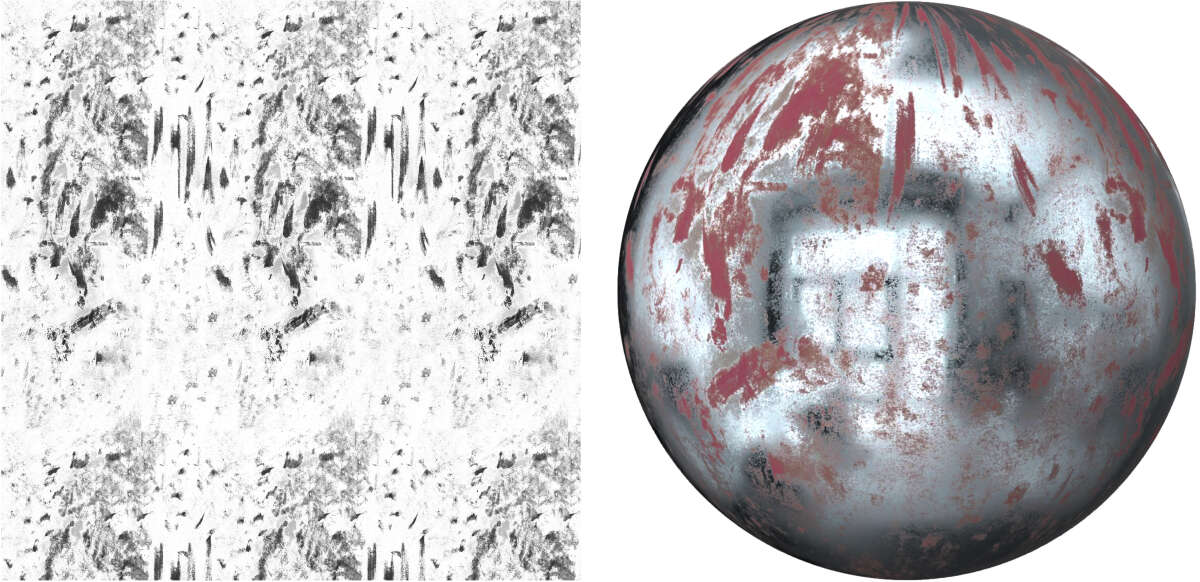
Image options for PBR maps
For all PBR maps, it's possible to apply the source image onto the tile to create more nuanced. The following options are available for the source images applied to PBR maps:
- None - No image, only the solid fill will be visible
- Grayscale - A grayscale version of the source image will be used for the tile
- Find Edges - A filtered source image that emphasises edges will be used for the tile
The source image can be modified further using the adjustment settings available below the image selector.
© Architextures 2026